When using any Windows version, such as Windows XP, Vista, 7 (Seven), 8, 8.1, 10 or Windows 11, many times it happens that we want to delete, move, or rename a file or folder, but we can’t do that and receive these error messages:
- Folder Access Denied: You need permission to perform this action.
- The source or destination file may be in use.
- The file is in use by another program or user.
- Folder in Use: The action can’t be completed because the folder or a file in it is open in another program.
- Cannot delete folder: It is being used by another program.
- Make sure the disk is not full or write-protected and that the file is not currently in use.
- Cannot delete file: Access is denied.
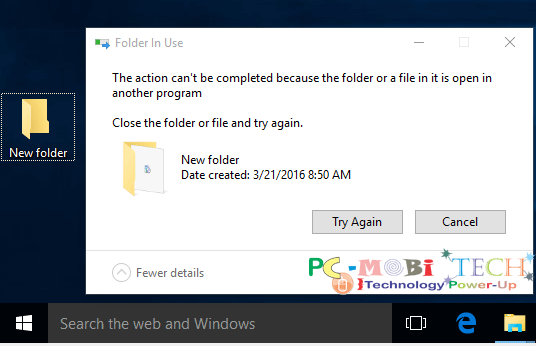
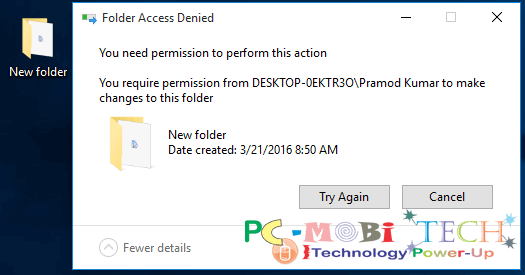
This is because the file or folder you want to remove, move, or rename is open in Windows, or the files inside the folder are being used by any running program. Sometimes a virus also corrupts these files or folders. Then we can’t delete, move, rename, or open those corrupted or password-protected files because we can’t find out which program is using them.
If you are facing any problem like the ones mentioned above and want to remove the file and folder from your hard drive, move from one place to another, or rename them, you can easily do that with File Unlocker. If the folder or file is locked, a window listing lockers will appear. Simply click Unlock All, and you are done!
Download Unlocker for Windows XP, Vista, 7 (Seven), 8, 8.1, 10 and Windows 11 PC:
Click here to go to download page
After downloading, open the download folder and double-click on the “Unlocker” setup to install Unlocker.
Also See:
- Windows 10 App Store not showing apps relevant to my country.
- How to download Windows 10 Home, Pro Official ISO.
- How to create a bootable Windows 10 USB/Pen Drive
- 4 ways to Uninstall software/apps on Windows 10
Rename, Move, Remove Protected Files & Folder.
After installing, right-click on protected files or folders and choose “Unlocker” from the context menu.
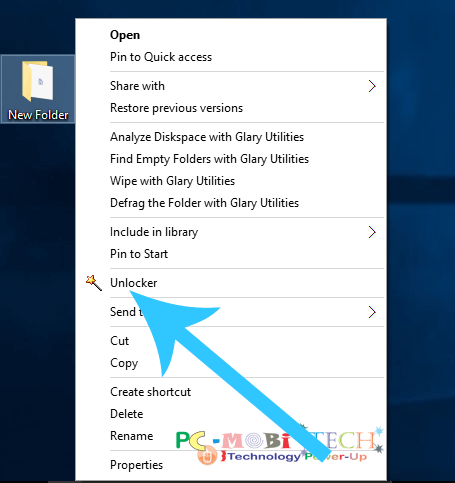
If any “User Account Control” permission dialog box appears, click Yes to allow “Unlocker” to “Run as administrator.”
Now, the Unlocker dialog box will appear. Choose “Delete”, “Rename”, or “Move” according to your needs from the “drop-down” list menu. After selection, click “OK”.
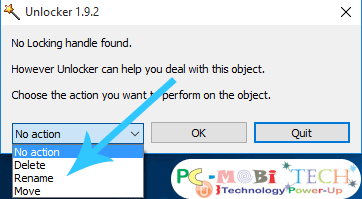
That’s it! Now your problem is resolved.
When you purchase through links on our site, we may earn an affiliate commission. Read our Affiliate Policy.





Great article. I will be going through a few of these
issues as well..