Are you looking to clone your existing operating system or partition to a new HDD, SSD, or NVME M.2 drive? If so, you’ve come to the right place. In this post, I will address the following questions:
- How to Copy A System OS to another Disk drive?
- How to clone partition to new Disk or SSD?
- How to Migrate Existing OS to New Drive?
- How to Use AOMEI Backupper Clone Feature?
- How to Copy drive using AOMEI Backupper?
In my previous post, I explained how to move an existing operating system from an HDD or SSD to a Samsung SSD. However, that post only covered the process for copying the OS to a Samsung SSD. If you’ve purchased an SSD from another brand, such as WD (Western Digital), Crucial, Seagate, Kingston, HP, or Acer, then the previous post would not have been applicable to you.
Therefore, in this post, I will describe how you can clone an existing drive to a new one without incurring any cost. This guide will cover all types of disks, including HDDs, SSDs, and NVME M.2 drives.
How to Copy a System OS to another drive using AOMEI Backupper?
First Download and Install AOMEI Backupper Standard. It is a free utility software and you don’t need to purchase any license for migrating an operating system.
Download AOMEI Backupper Standard
After Download, open the Download Folder and double click on the “AOMEIBackupperStd” setup file and follow the on screen instruction.
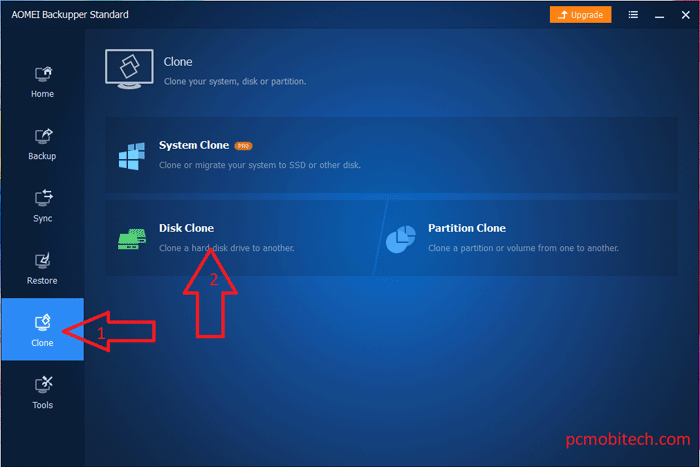
- Once Installation finishes, open the AOMEI Backupper Standard and Click on the Clone option.
Now you will see 3 options here: System Clone, Disk Clone, Partition Clone. As you can see System Clone is Pro feature so you will have to purchage pro license for only copying System OS. But you can also do the same with Disk Clone Feature for Free.
Partition Clone feature will give you a small trouble because at a time you can only copy one partition but a operating system always create another partition for System Reserved important files. So your destination disk won’t work if you use Partition Clone option. So we will use Disk Clone option.
- Next Click on the Disk Clone option.
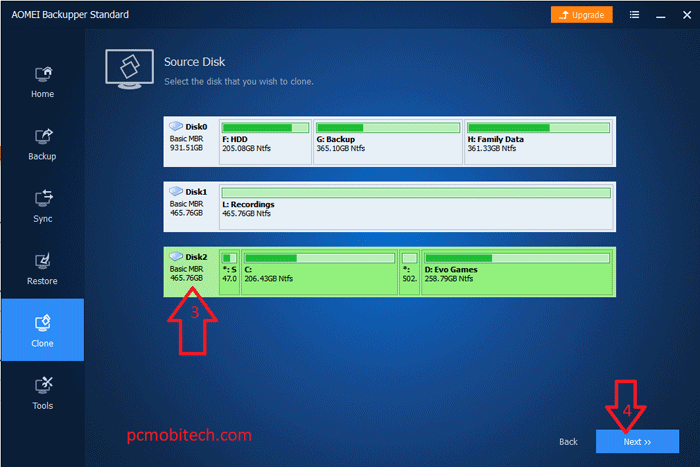
- Now you will need to select Source Disk, which System OS you want to copy. After selection source disk click on the Next » button.
- At the next screen, you will have to choose Destination Disk where you want to copy system drive.
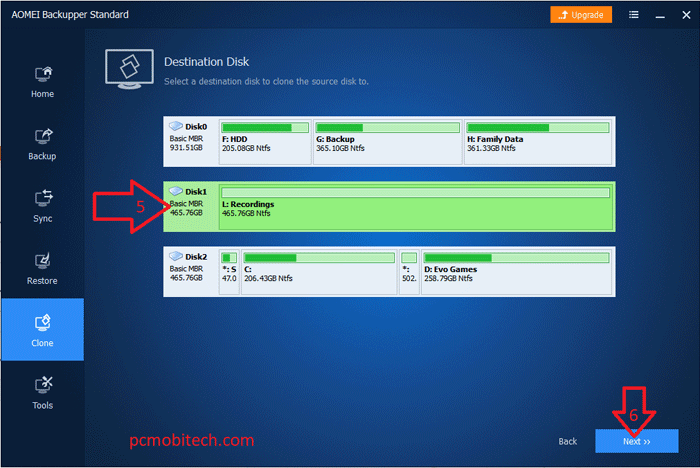
Tip: The Destination drive must have same or more storage, if you use lower size disk than a source disk you will get the error. So always use similar or extra size disk.
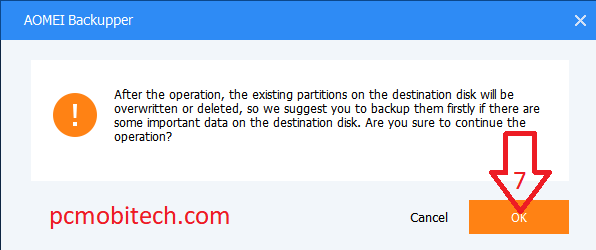
- As soon as you click Next buton, it will ask for a confirmation because if you have any data on the destination disk then it will be also wiped. So take backup from the disk before preceed.
- Now you will see Operation Summary, here you will see following option:
1- Edit Partitions: You can’t change anything in this option because it is a premium feature and only available for Pro version.
2- SSD Alignment: It only speedup cloning process, If the Destination Disk is a SSD then only select this option, otherwise leave as it is.
3- Sector By Sector Clone: It will clone each sector one by one, doesn’t matter it is bad sector or good and also it is neccessory that Destination Disk must have more Disk space than Source Disk because it require additional space while copying data. As well as when disk sizes are same don’t select this because it will throw an error.
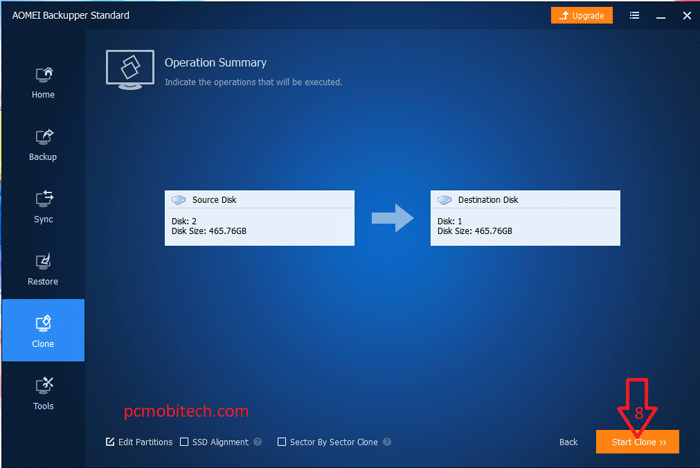
- After choosing currect options, click on the Start Clone button.
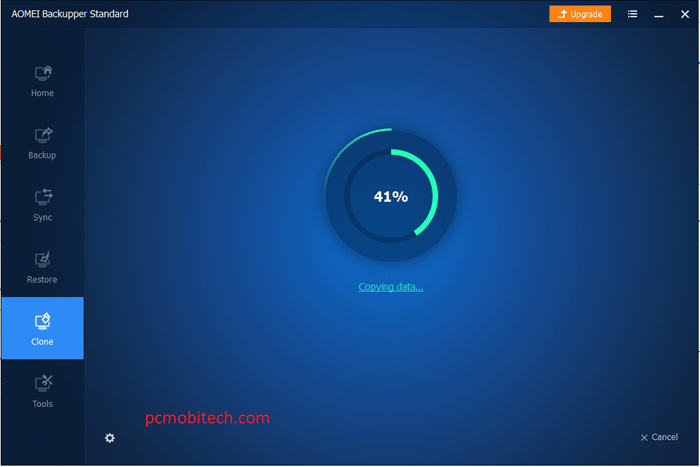
- Now wait until the cloning is complete. Once it finishes You will see following message: Congratulations! The Clone task has been completed successfully.
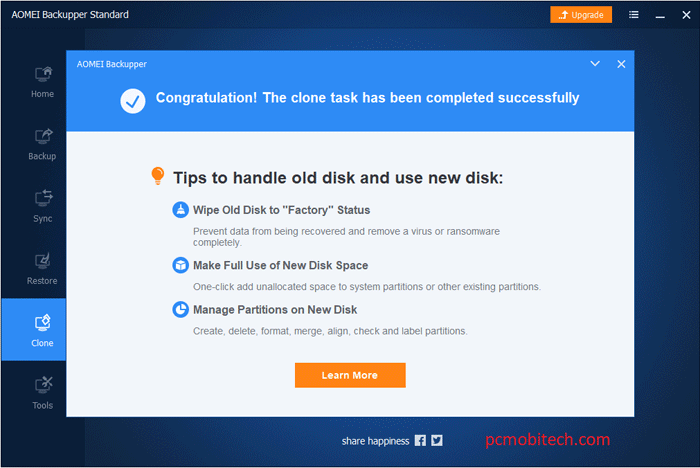
- Now you can close the screen by clicking on X (close button) and then click on the Finish button.
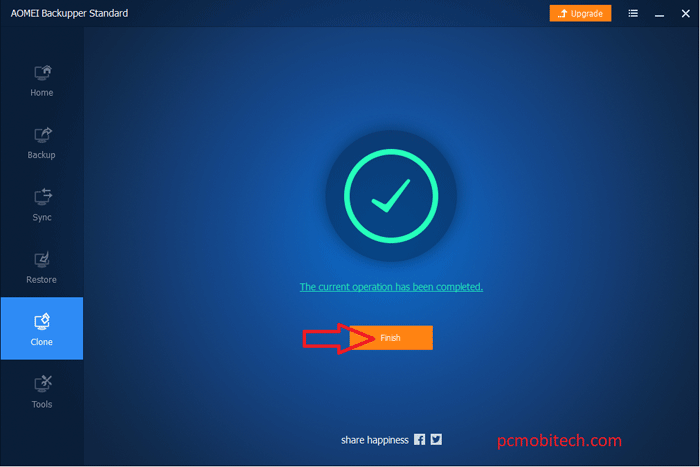
- That’s it! you have successfully clonned an existing Disk/drive/OS/System OS to another disk.
Any Question regarding to the post? write down in the comment box.
When you purchase through links on our site, we may earn an affiliate commission. Read our Affiliate Policy.


