If you’re using Windows 10 on your computer or laptop, it is necessary to sign up for a Microsoft account and sign in to your Windows 10 device with that account. Without a Microsoft account, you can’t fully utilize Windows 10. A Microsoft account provides access to various services, including Windows updates, the Windows Store, Outlook, Office, Skype, OneDrive, Xbox Live, Bing, and MSN. Additionally, you can enable the Find My Device option, which helps you track or locate your lost Windows 10 device online in case it is lost or stolen.
Therefore, it is beneficial for the security of your Windows 10 device to sign up for a Microsoft account. Microsoft account signup is free, and you can do it through a web browser or directly from Windows 10. If you sign up using Windows 10, you won’t need to sign in separately, as it will automatically sign in to your account after the signup process. Here’s how to create a free Microsoft account using Windows 10.
Create a Microsoft account using Windows 10.
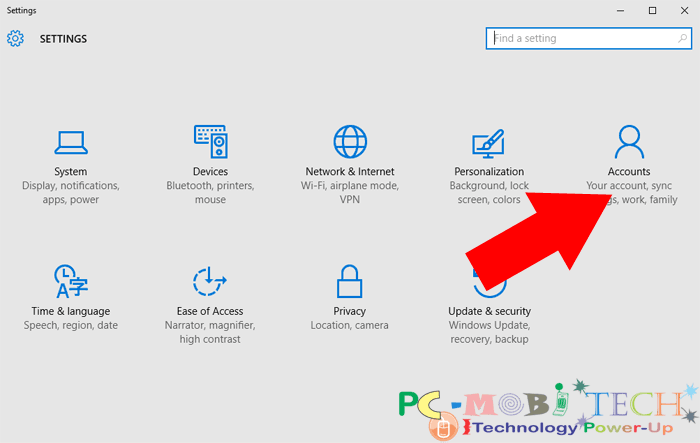
Click on the “Start Menu” and choose “Settings”. In the Settings window, click on the “Accounts” option.
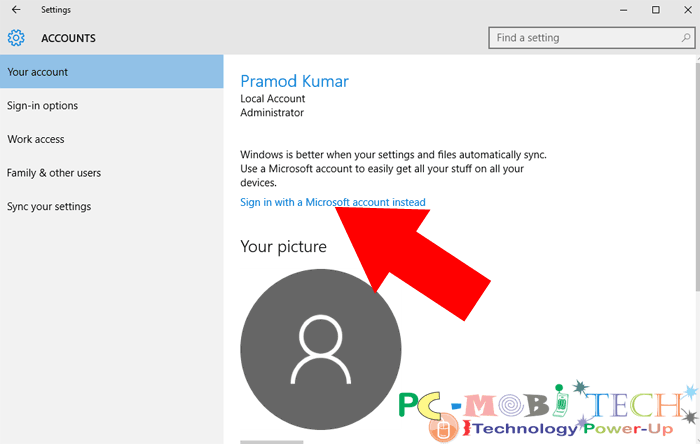
Now you’ll see ACCOUNTS window and Your account tab will be automatically selected. Here click on Sign in with a Microsoft account instead.
Now, you’ll see the “ACCOUNTS” window, and the “Your account” tab will be automatically selected. Click on “Sign in with a Microsoft account instead”.
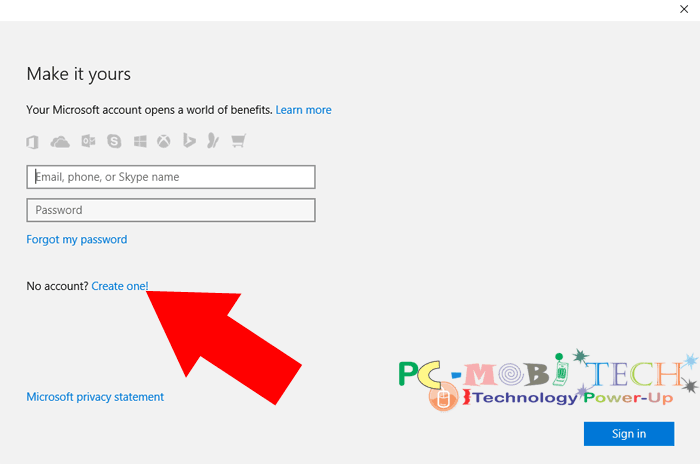
On the next “Make it yours” screen, if you already have a Microsoft account, sign in using your existing Microsoft account ID and password. Otherwise, to create a new one, click on “Create one!”
Also See: How to track or find your lost Windows 10 Laptop online.
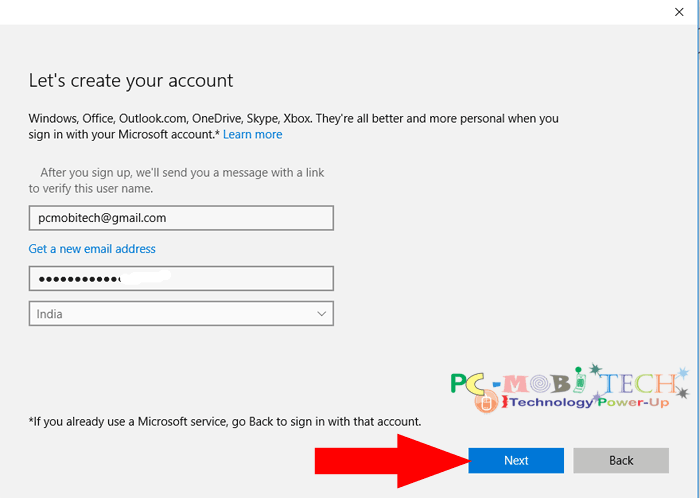
On the next screen, enter your existing email ID (Gmail, Yahoo, or any other email account ID) in the first box. In the second box, enter a strong password, and in the third, choose your country. After this creation, click on the “Next” button.
The “See what’s most relevant to you” page will appear. Here you can uncheck two boxes related to your privacy and advertising if you’d like; otherwise, click on the “Next” button.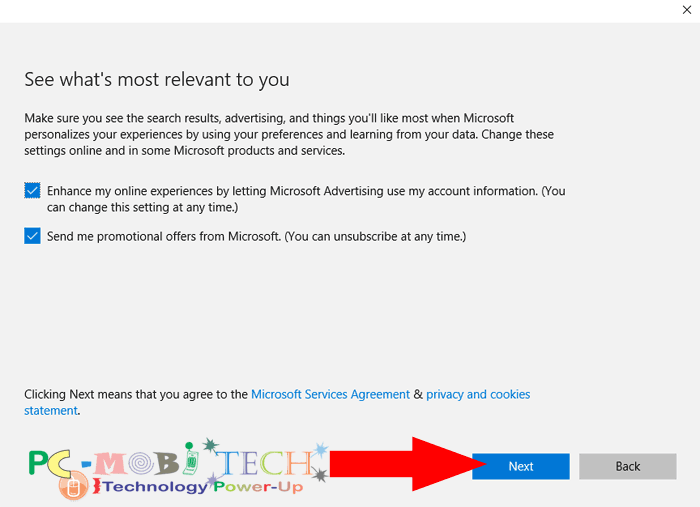
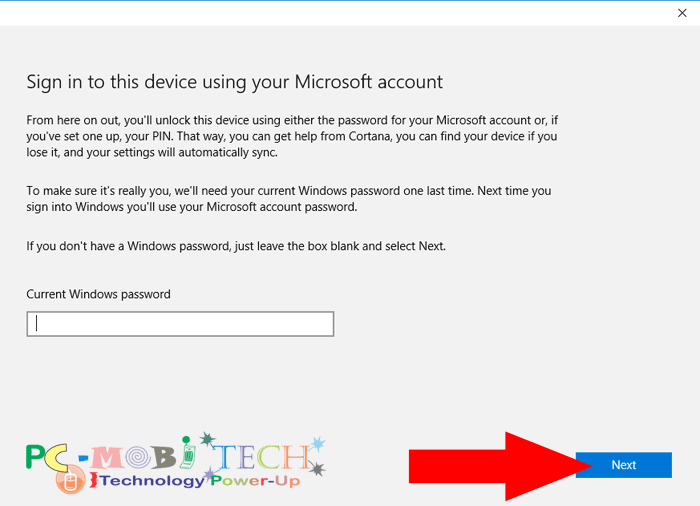
On the next screen, you will be asked to enter your “current Windows password”. If you have set up any login password for the Windows 10 Welcome (lock) screen, enter the password here. This step helps you recover your Windows password if you forget the login password. Enter the password and click on the “Next” button.
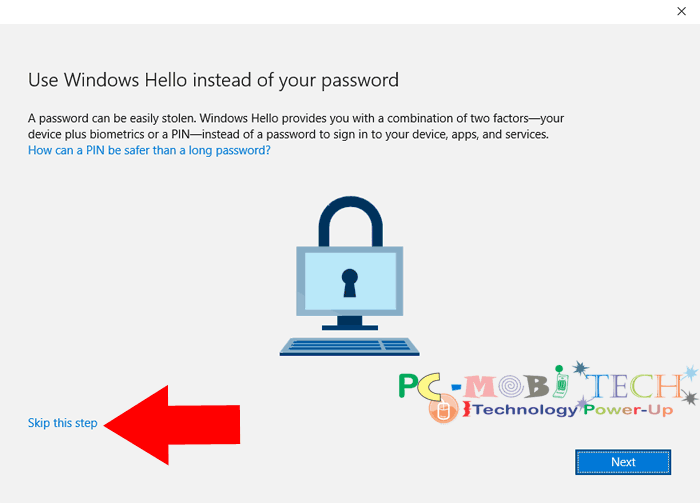
The next “Use Windows Hello instead of your password” dialog box will appear. On this screen, you can use the Windows Hello dual-factor security feature, but I suggest doing it later (you can set up this option anytime by going to Start button > Settings > Accounts > Sign-in options). Click on the “Skip this step” option, and the Microsoft account signup has been completed.
Verify your Email address.
Your account signup is now completed, but you’ll need to verify your email ID to finalize it. An email has been sent to the address you provided during the signup process. Please go to your email account, open the email received from the Microsoft account team, and click on the “Verify” button.
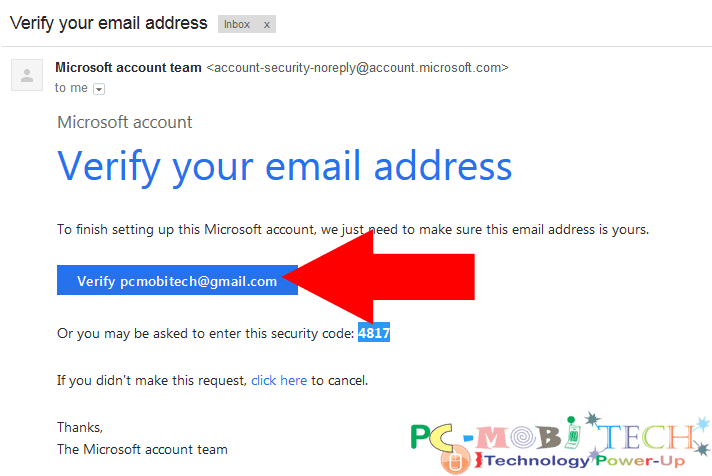
Once you click on the “Verify” button, a new tab will open in your browser. In this new tab, log in with your Microsoft account ID (your email address) and the password you created during the signup. After completing this step, your verification will be finalized.
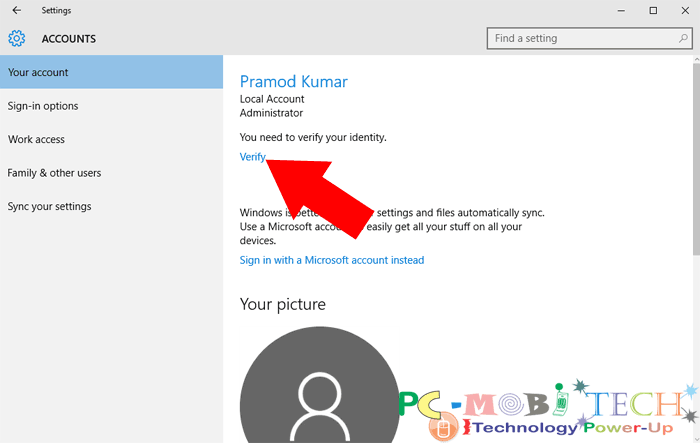
In the Accounts Window after verification, click on the “Verify” option, and your computer will have successfully signed in to your Microsoft account.
Must Check:


